Fastly Service Configuration Guide
Requirements
To get started, you will need:
- A Fastly account with access to the Delivery Service feature.
- A valid application key to interact with Vesper.
- Signals tag needs to be added to the client application. Refer to Signal Tags Configuration for more information.
Steps
1. Create a new service
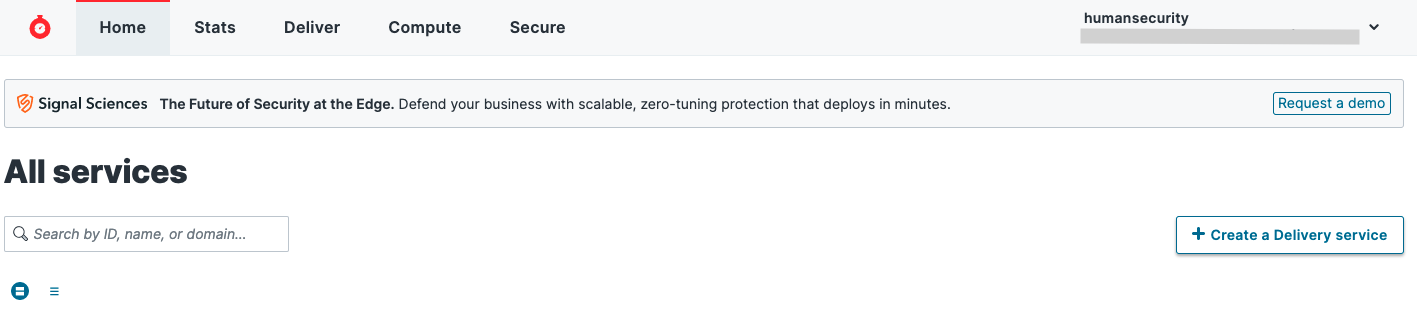
To create a new service you need to be logged in to a Fastly account, then click on the “Create a Delivery service” button.
It will redirect you to the service configuration page. You will find all the available configurations in the sidebar.
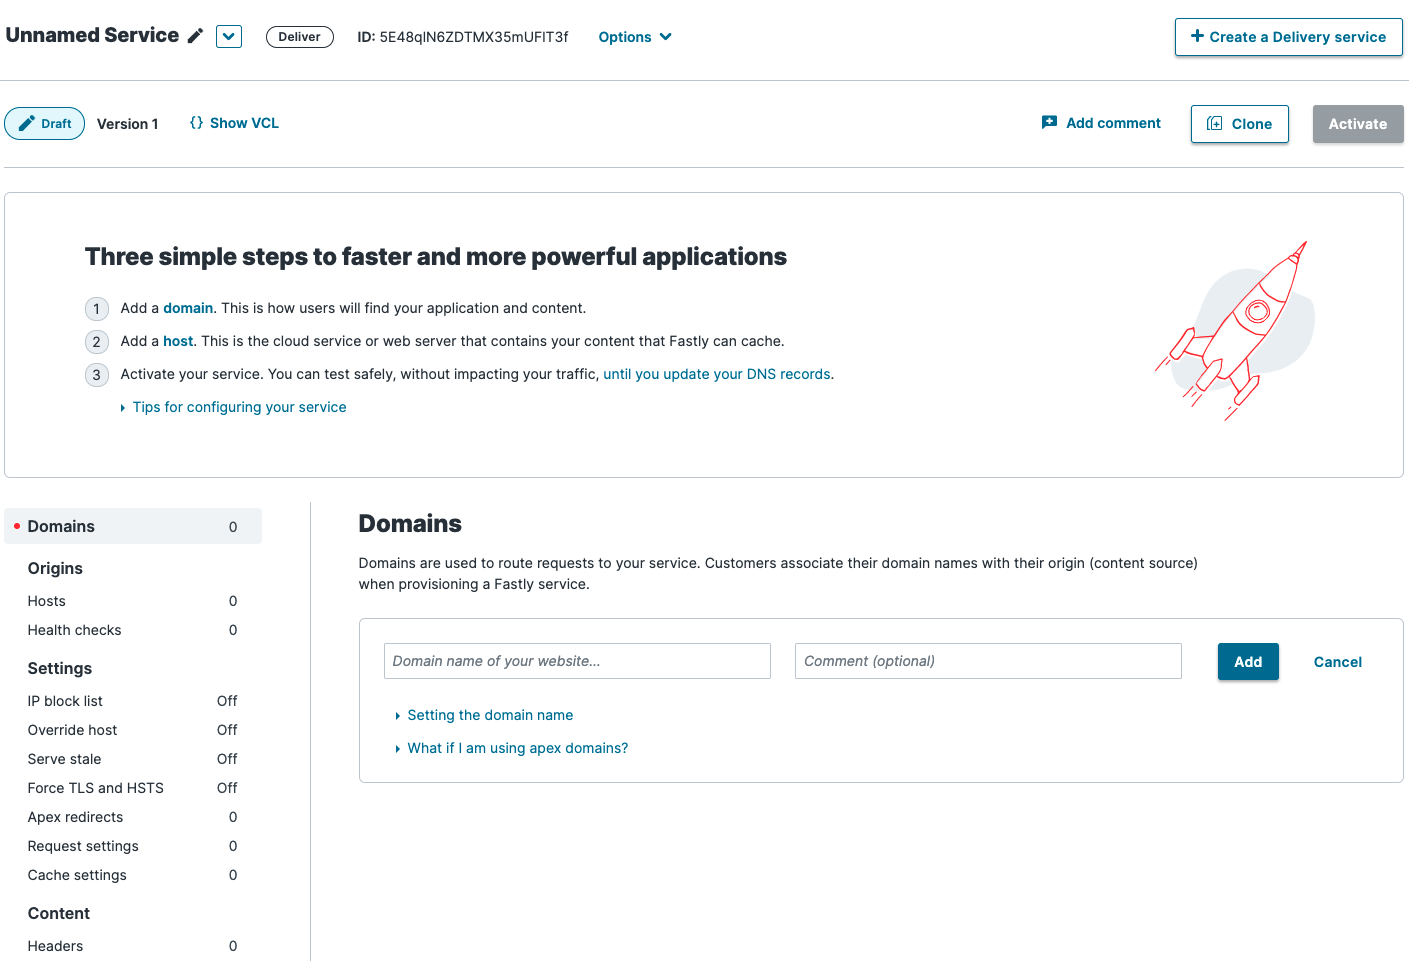
Fastly provides a versioning system to keep track of the changes in your service. Once you activate a version, you can’t modify it. So you need to clone it and create a new one.
2. Setup Domain Records (non-TLS mode)
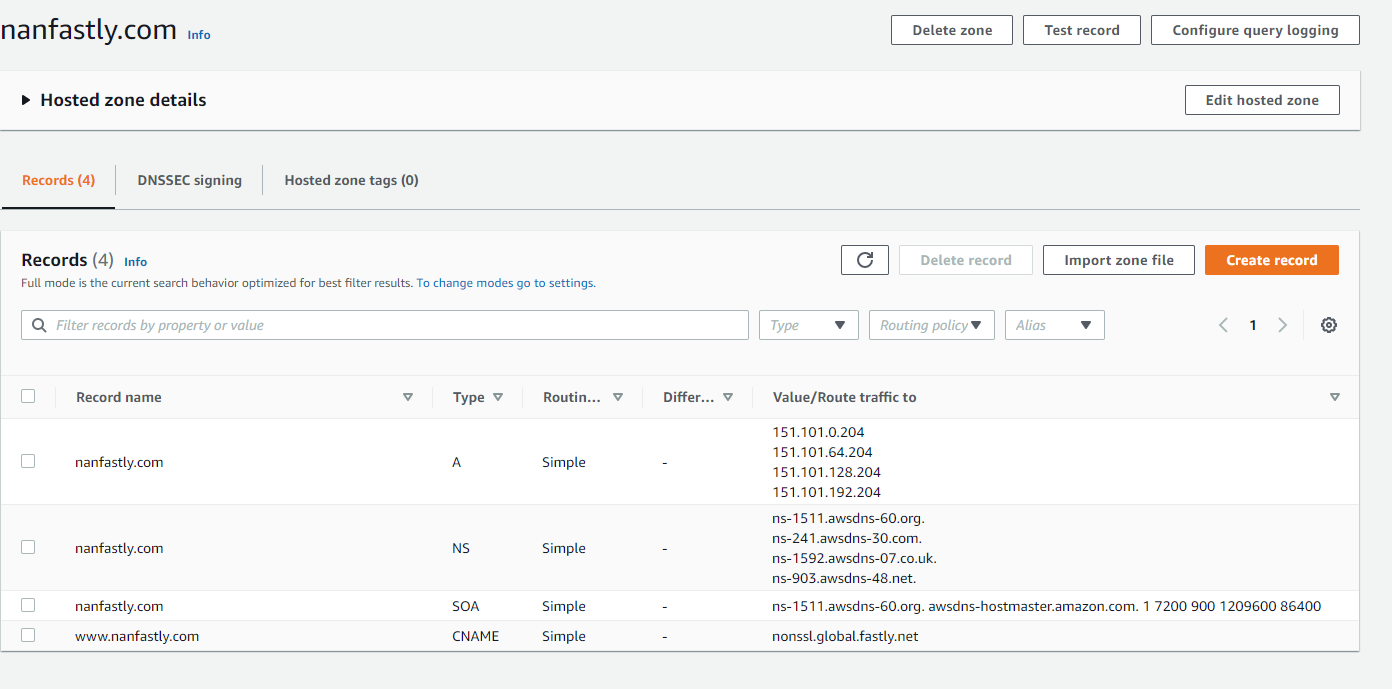
We're using the nanfastly.com domain for the examples so we need to adjust some records, the domain we're using here is in AWS.
Before you add a DNS CNAME record, keep in mind the following:
- If you plan to use Fastly on your apex domain (e.g.,
example.comrather thanwww.example.com), we can't use a CNAME record. See the guide to using Fastly with apex domains for more details. You can't add a CNAME record for a free TLS hostname.
Adding Fastly DNS records - for the current configuration, we need to add one CNAME record and 4 AnyCast fastly IPs so that the domain points requests to the Fastly Network.
Before having these records we remove the A record that serves the site to protect, and we need to move it to the Fastly service settings.
3. Set up the domain
Setting up a new domain is the first step. This is how users will find your application. Select the “Domain” section in the sidebar and proceed to add the domain name.
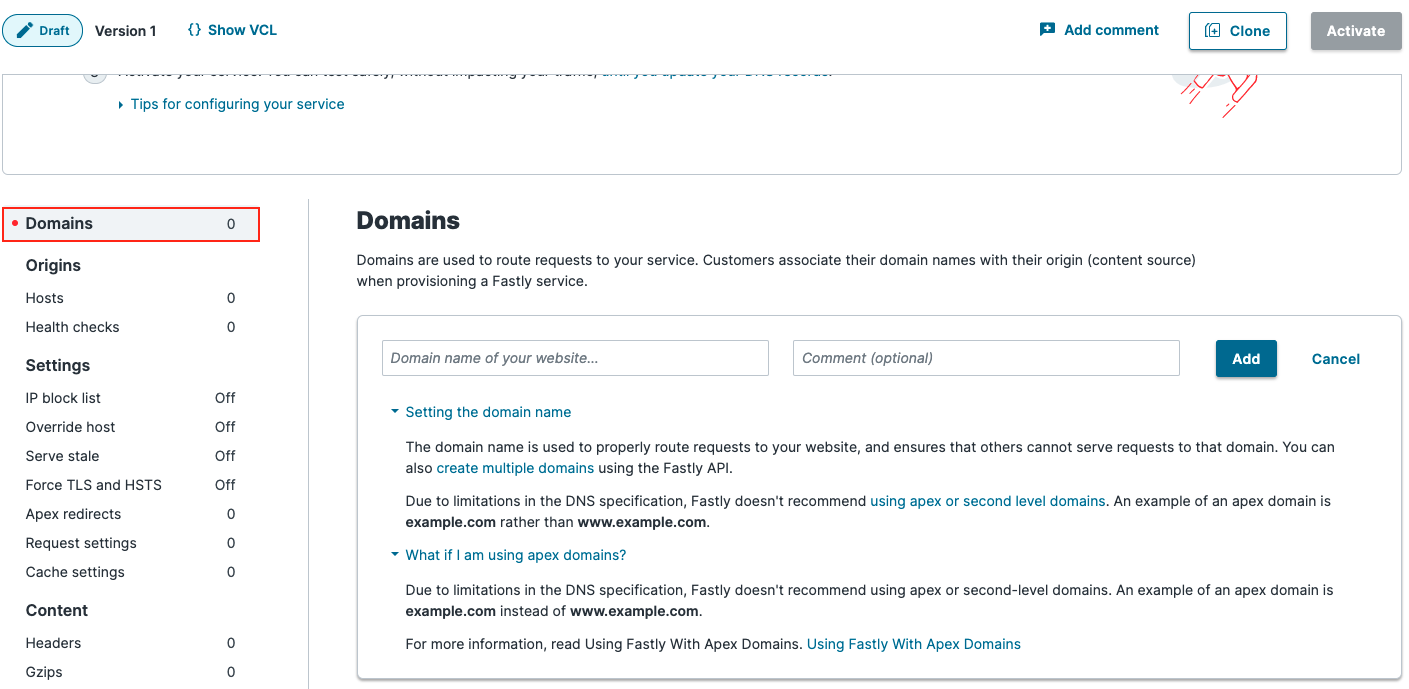
There is the possibility of setting up an apex domain, but it is not recommended by Fastly.
Note: Your domain needs to be pointed to Fastly IPs in order to redirect all the requests to the service.
For our example, on the Fastly service configuration in the Domain section, we add the AWS domain.
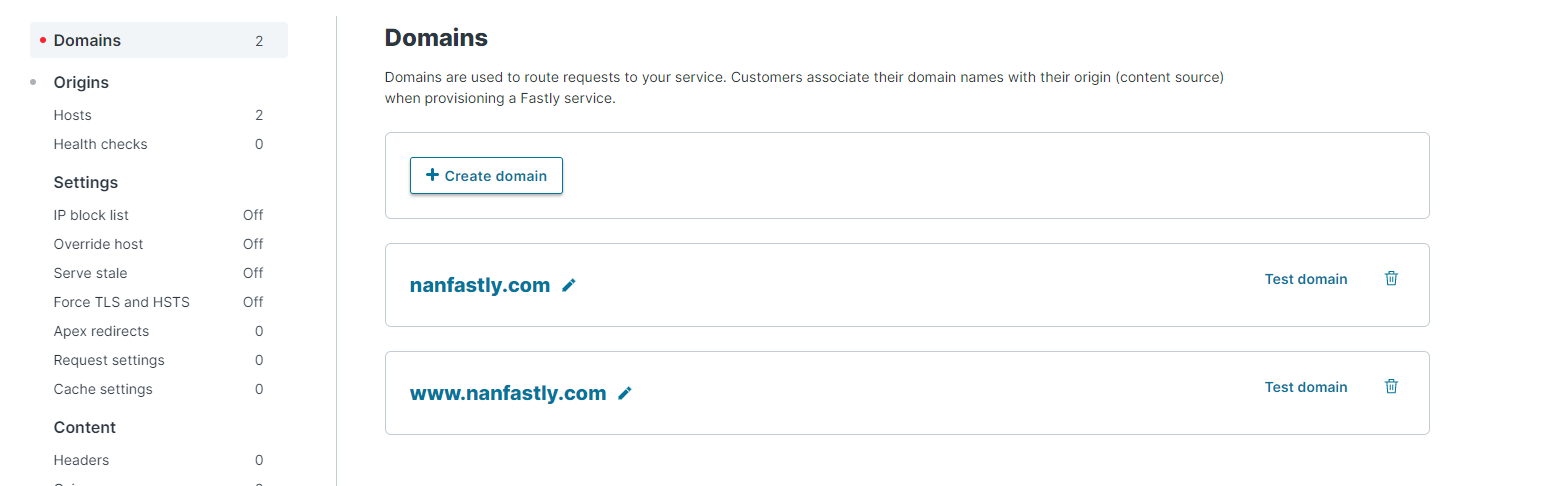
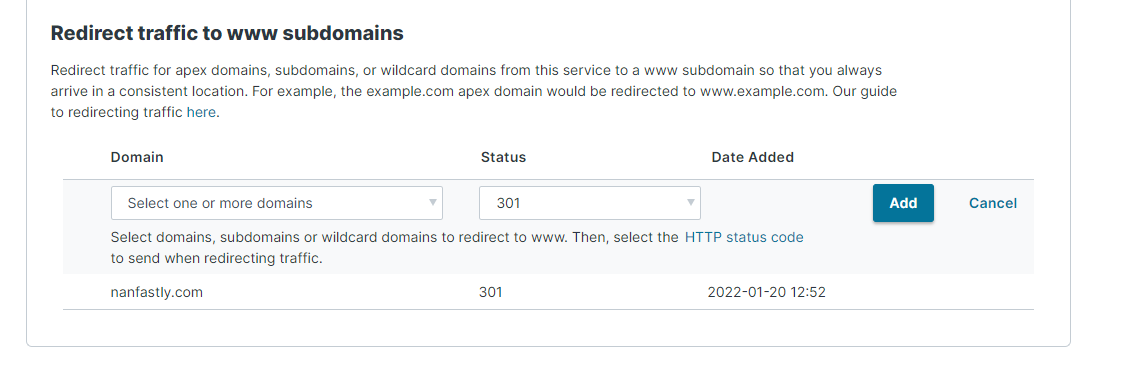
Since the above domain is apex nanfastly.com: we also need to redirect the www.nanfastly.com to nanfastly.com. Under settings > apex redirections add the following:
4. Set up your backend
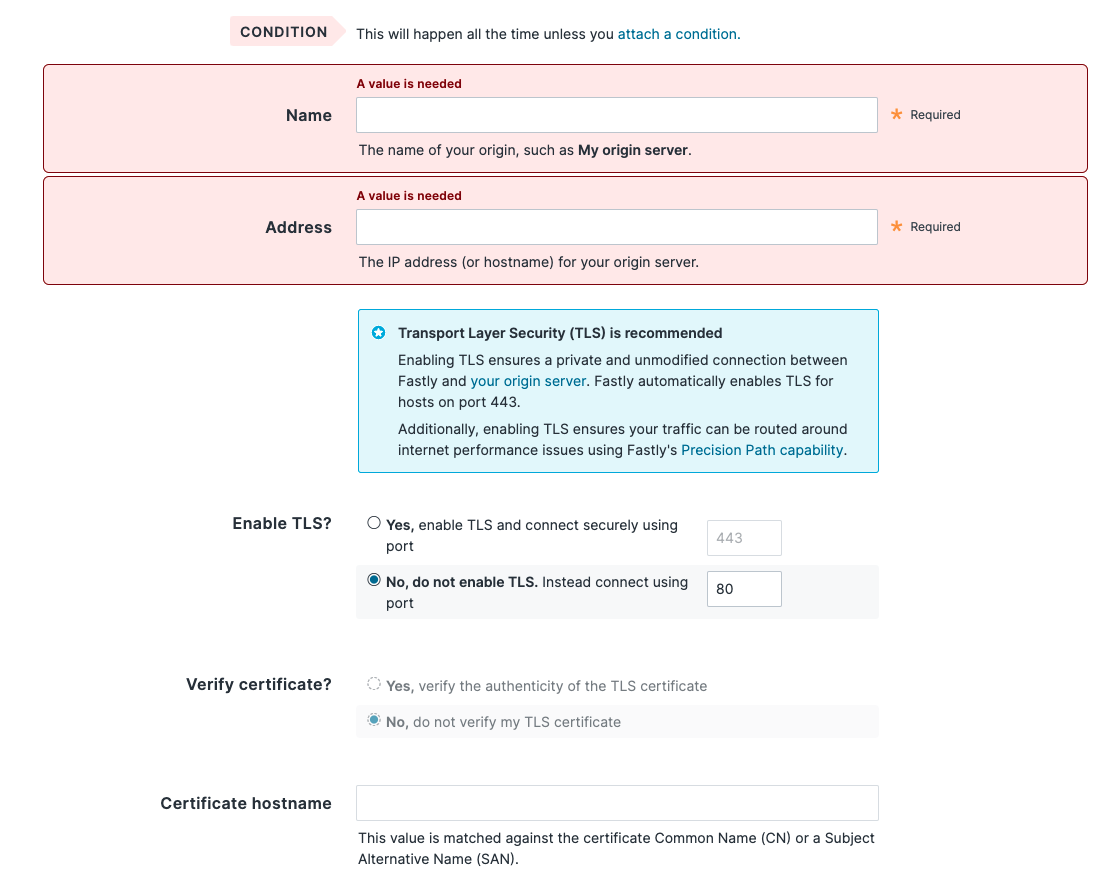
To set up your backend (where requests will be redirected), you need to move to the “Host” section in the sidebar.
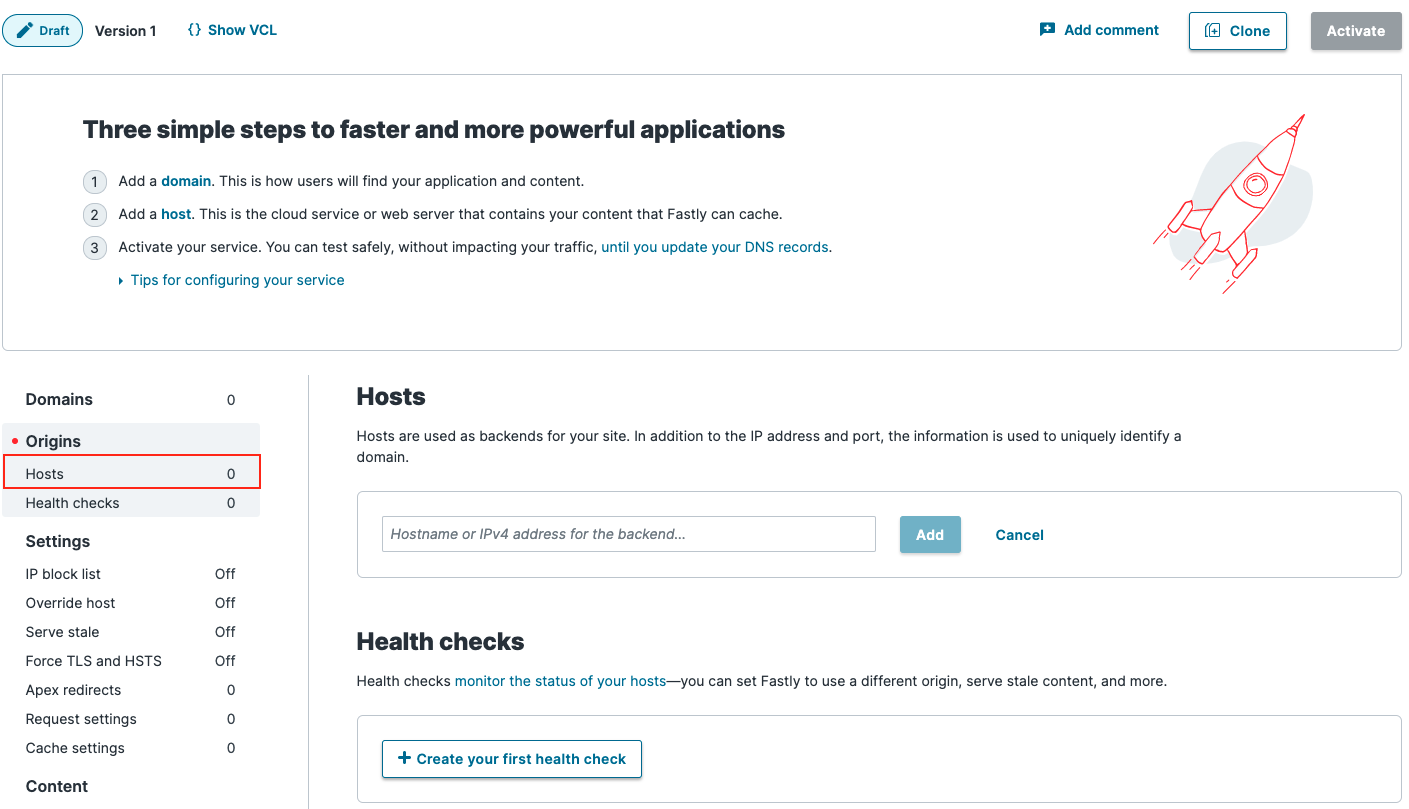
Hosts are used as backends for your site. In addition to the IP address and port, the information is used to uniquely identify a domain. Once you add the backend, you can edit it and add more specific configuration.
5. Set up Vesper
Setting up Vesper as a new Host allows you to redirect the request and protect the different routes that you need to protect.
You need to move to the “Host” section in the sidebar and create the new server with the following hostname: vesper.p.botx.us
Vesper requires authentication by JWT API Keys, so you will need to set up this key in the service as a dictionary.
To create and set up the dictionary, you will need to move to the Data/Dictionaries option in the sidebar and click the “Create your first dictionary” button.
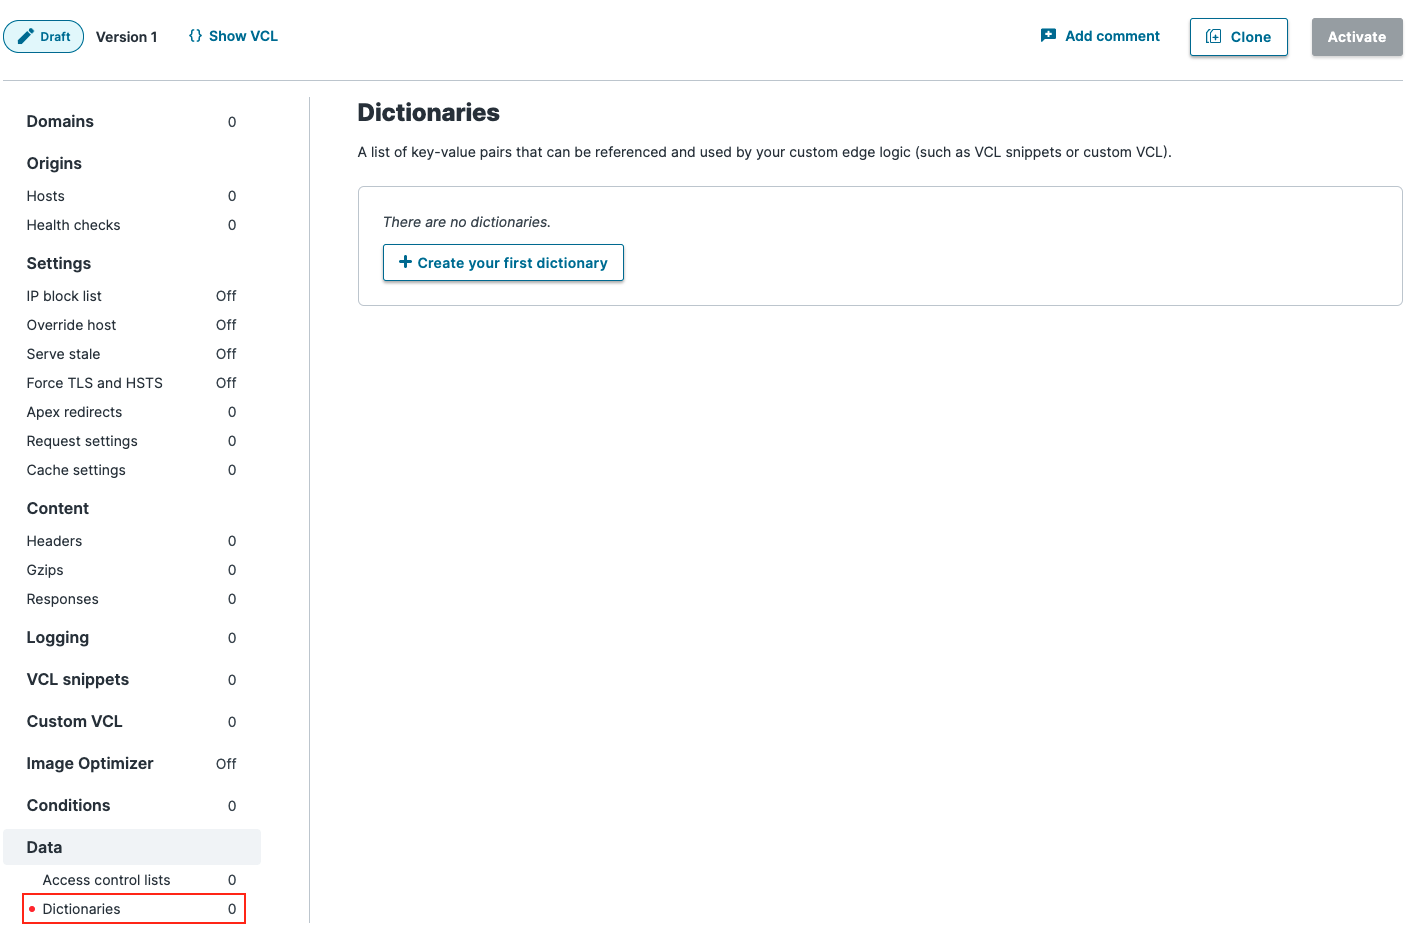
The name of the dictionary has to be “config”. Once you add it, it’s necessary to add a new item to it.
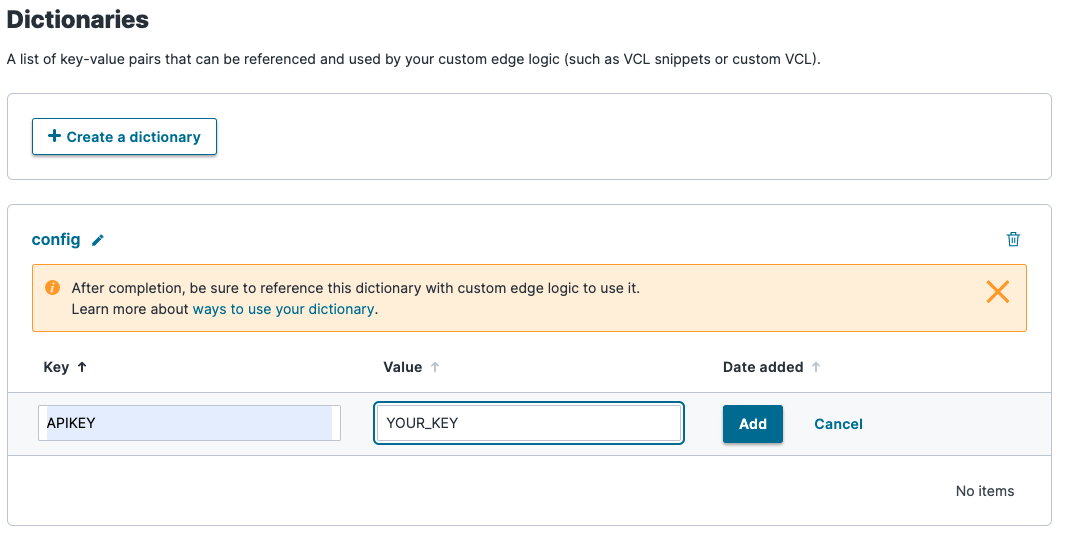
The name of the new item has to be “APIKEY” and in the value, you have to replace it with your Vesper’s API Key for Decisions.
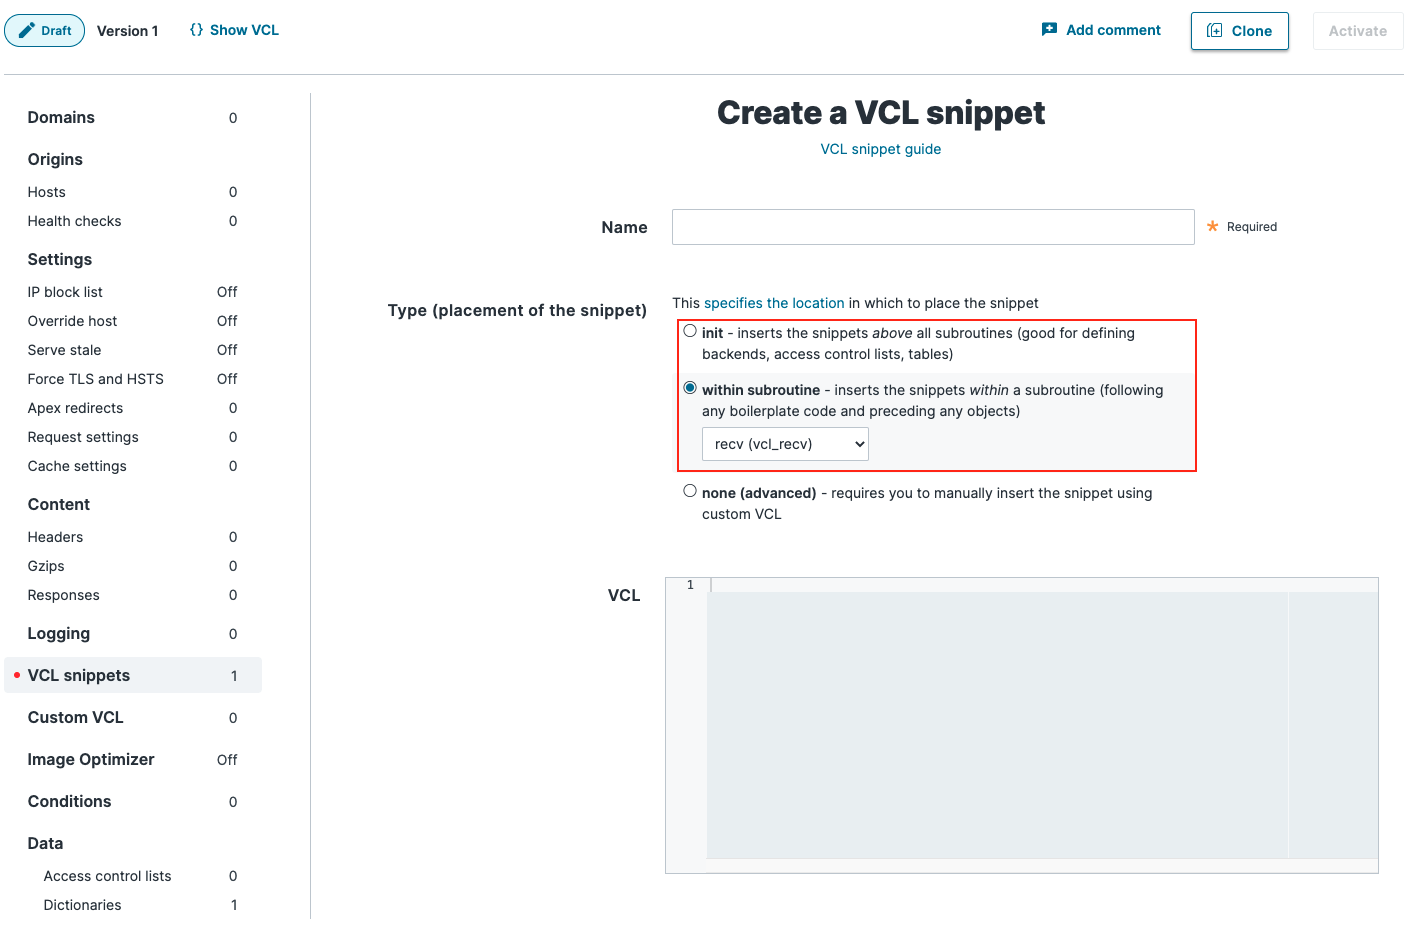
6. Set up VCL Snippets
The VCL snippets are in charge of analyzing the request, reaching Vesper, and deciding if the route needs to be protected. Each snippet specifies a subroutine in our VCL code.
To set up the snippets, click on the “VCL Snippets” in the sidebar, and then create a new one.
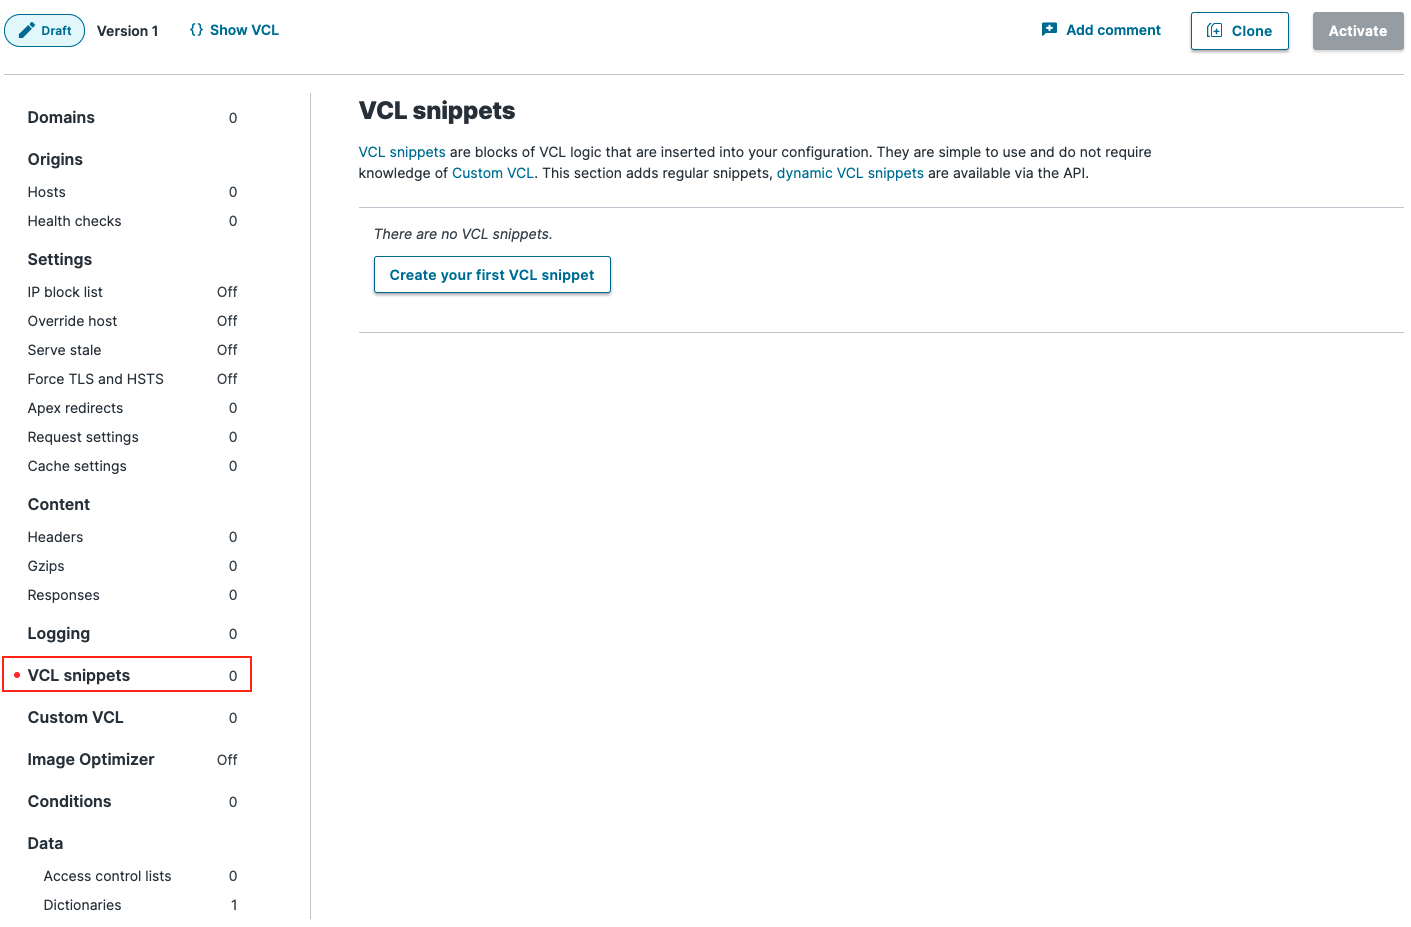
You will need to create four different types of snippets:
- Init: inserts the snippets above all subroutines (we will use it to define some specific functions).
- RECV
- ERROR: allows us to customize the different errors.
- DELIVER
All the snippets will be provided by HUMAN according to the needs of the different clients.
7. Activate the Service
Once you have set all the configurations, you are ready to activate the service and start using it through Fastly.
You can activate it by clicking on the “Activate” button on the top-right corner of the page.

Apex
Adding Signals Tag to Client Application
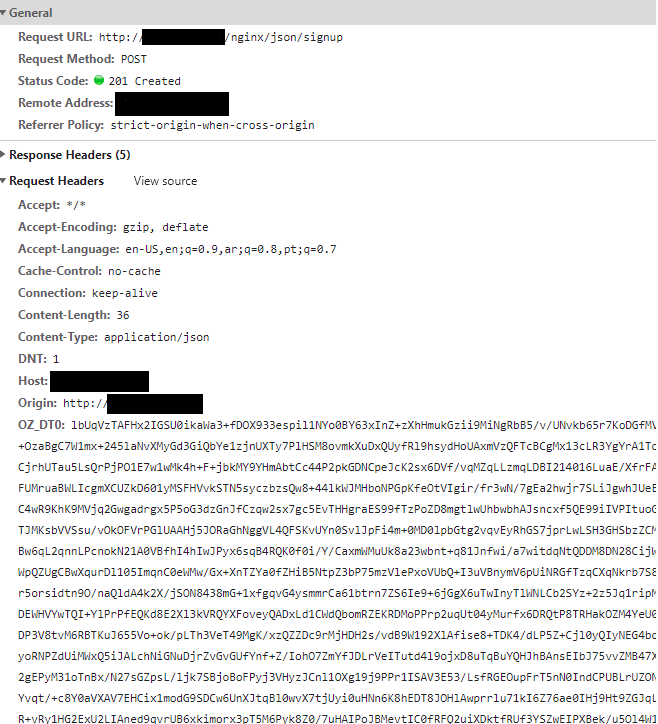
In order to protect the client routes, we need to collect signals from the page. In the image below we are adding to a "walker-works" app script tag with the sh parameter (signals header) equal to 1 (True), in addition to ci (client id) and other settings.
Second, we add the HumanConfig to specify the API domain and the specific routes where we need to collect signals.

Having this setting set at root HTML page, when a request is made to one the specified routes, it will include the additional signals headers - OZ_DT, OZ_SG and OZ_TC.