
AWS CloudFront Deployment Guide
Overview
Clients using AWS CloudFront can deploy the BotGuard for Applications solution without modifying their front-end or back-end code. You can set up this integration in two steps:
- Create an AWS Lambda function for your integration.
- Deploy this function to Lambda@Edge and add a new CloudFront trigger to your desired distribution.
Requirements
Before deploying the integration to AWS CloudFront, you must meet the following requirements:
- You must have access to the AWS Management Console for the account that manages your site and infrastructure. Your user account will need:
- The AWSLambdaFullAccess IAM policy (or equivalent permissions) in order to create and edit a new AWS Lambda function.
- The lambda:GetFunction, lambda:EnableReplication*, iam:CreateServiceLinkedRole, and cloudfront:UpdateDistribution permissions in order to associate the Lambda function with a CloudFront Distribution.
- The CloudFrontFullAccess IAM policy (or equivalent permissions) in order to create a CloudFront distribution, if this distribution does not yet exist.
- You must have a CloudFront distribution for your associated site. If you have not previously created one, you can follow the steps in this AWS guide to create one.
- Please note that the BotGuard for Applications integration only supports CloudFront distributions with custom origins. For example, this could be an EC2 instance or an ELB with a custom origin. In the example deployment below, we have an ELB in front of our servers, and its domain is used as the custom origin for our CloudFront distribution.
- The origin for your CloudFront distribution must be configured to only accept traffic from CloudFront. This is necessary to prevent users from bypassing the system's protection and accessing content directly from your server. To configure this setting, you can follow the steps in this AWS guide.
Deployment Guide
Create the AWS Lamdba Function
Log in to the AWS Management Console.
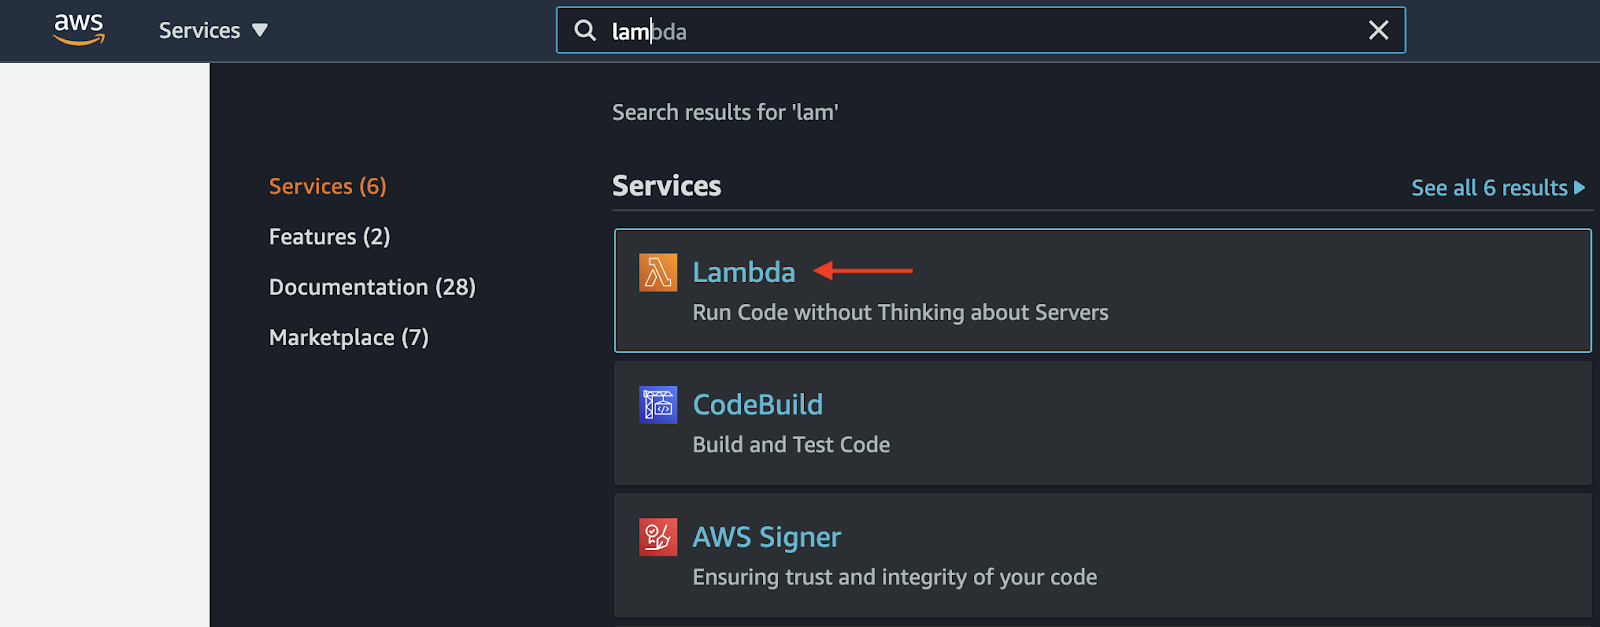
Enter “Lambda” in the top search bar, then select the Lambda service.

Select Create function.
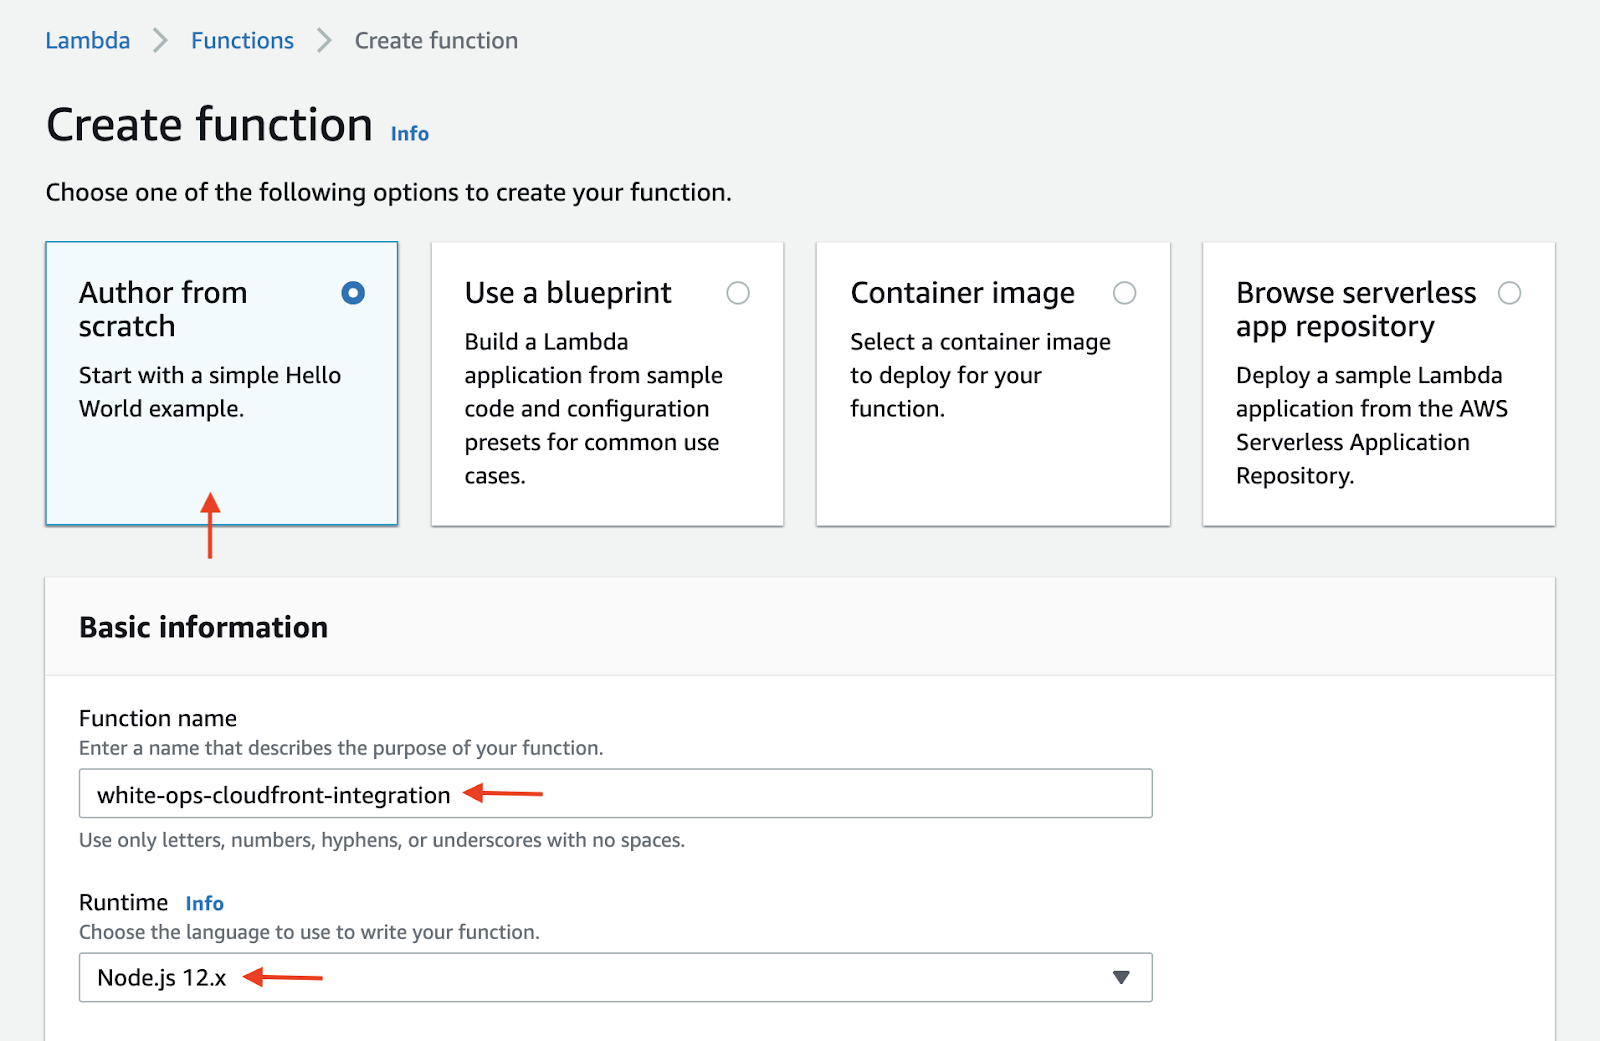
From the available choices, select Author from scratch, then enter a name in the Function name field (e.g.,
human-cloudfront-integration).Select Node.js 12.x from the Runtime drop-down menu.
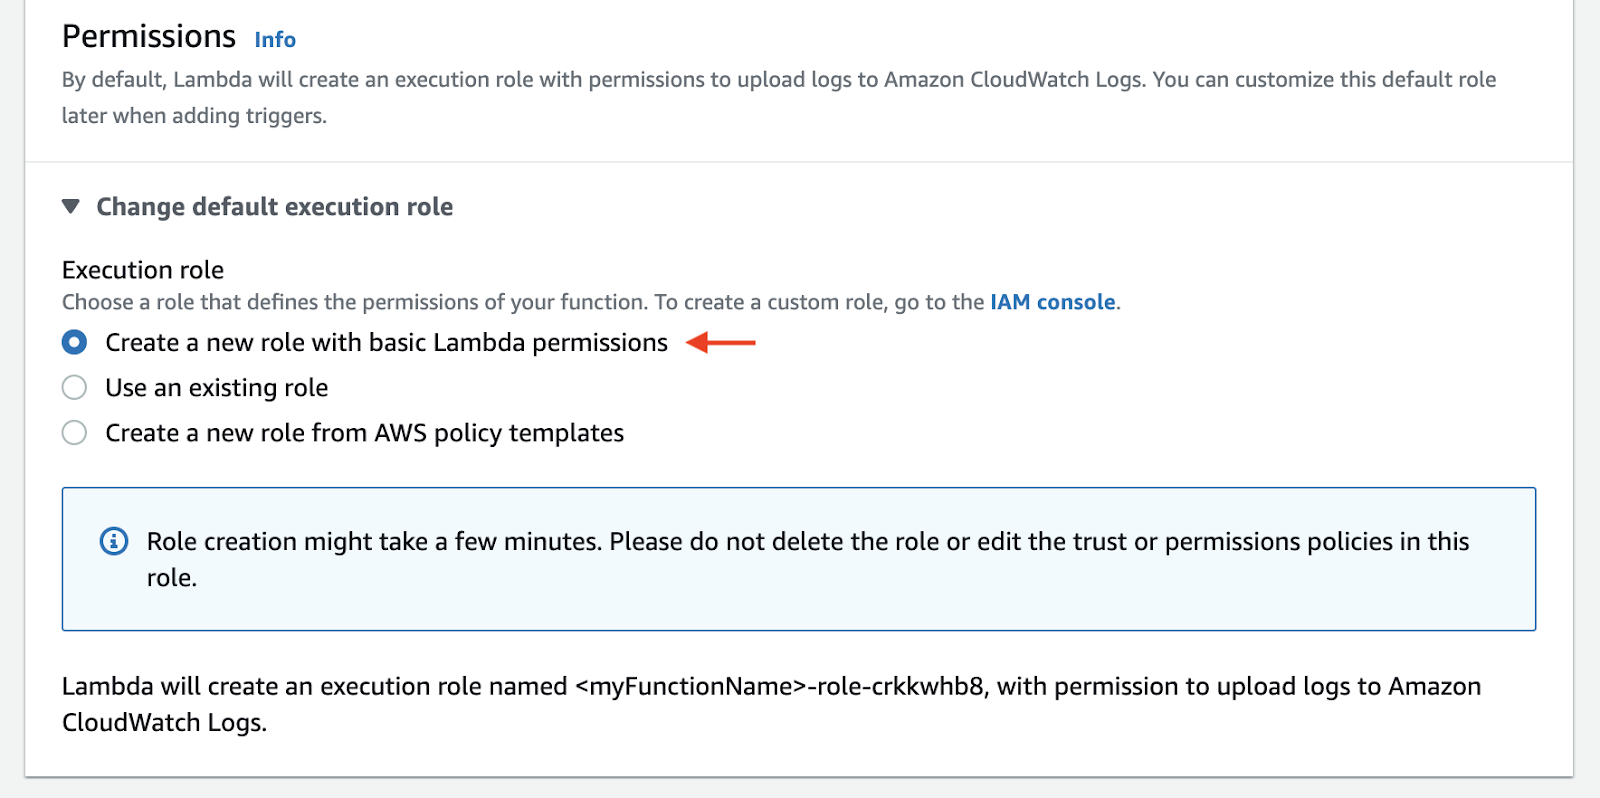
Under Permissions > Execution role, select Create a new role with basic Lambda permissions. This will create a role with the necessary permissions to allow the function to write logs to CloudWatch.

Select Create function to save your changes.
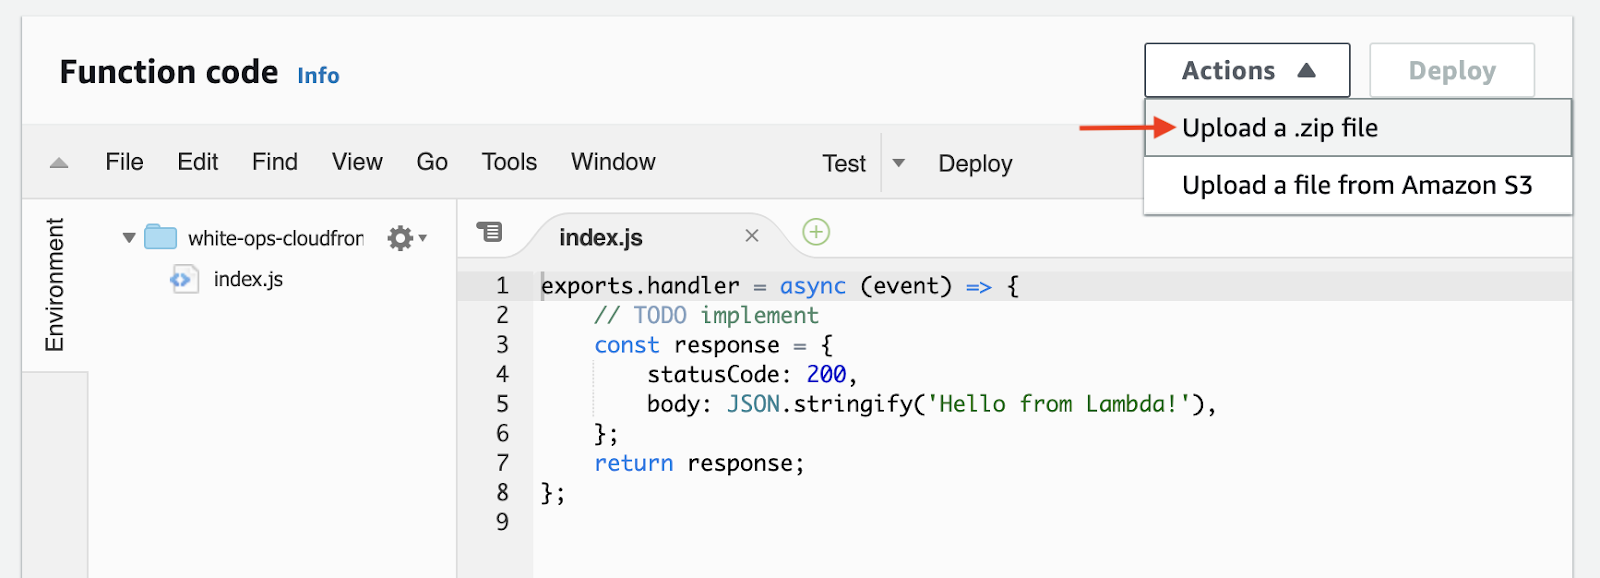
After you’ve created the function, you will be redirected to the function editor page.
Open the Actions drop-down menu, then select Upload a .zip file.
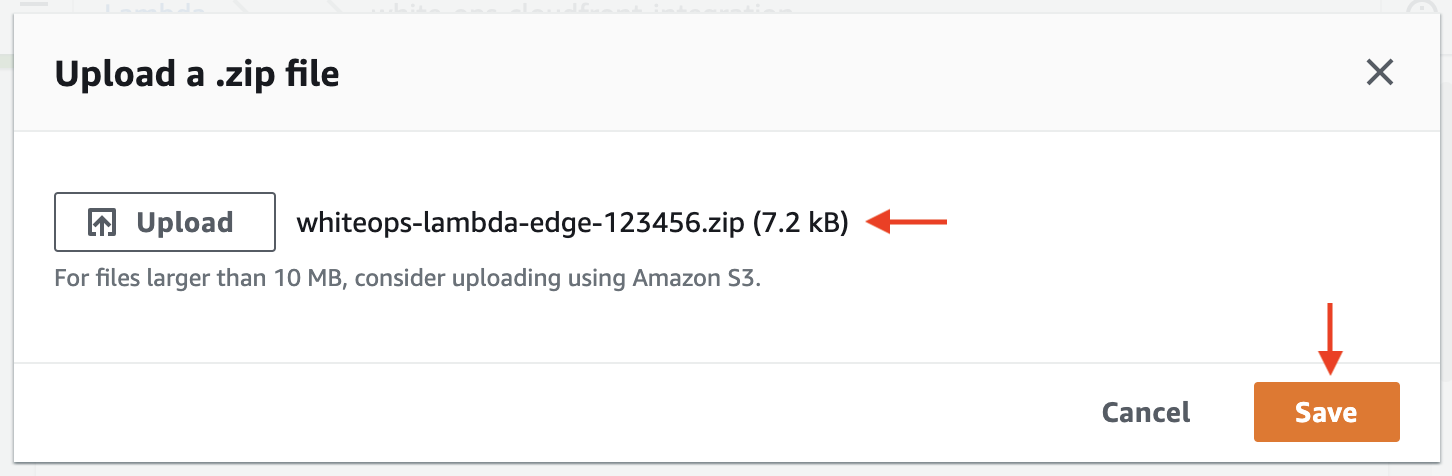
In the modal that appears, select Upload, then locate the .zip file provided to you by HUMAN. Make sure the correct filename is displayed after you upload the file, then select Save.
Your code will now be loaded into the Lambda function editor.
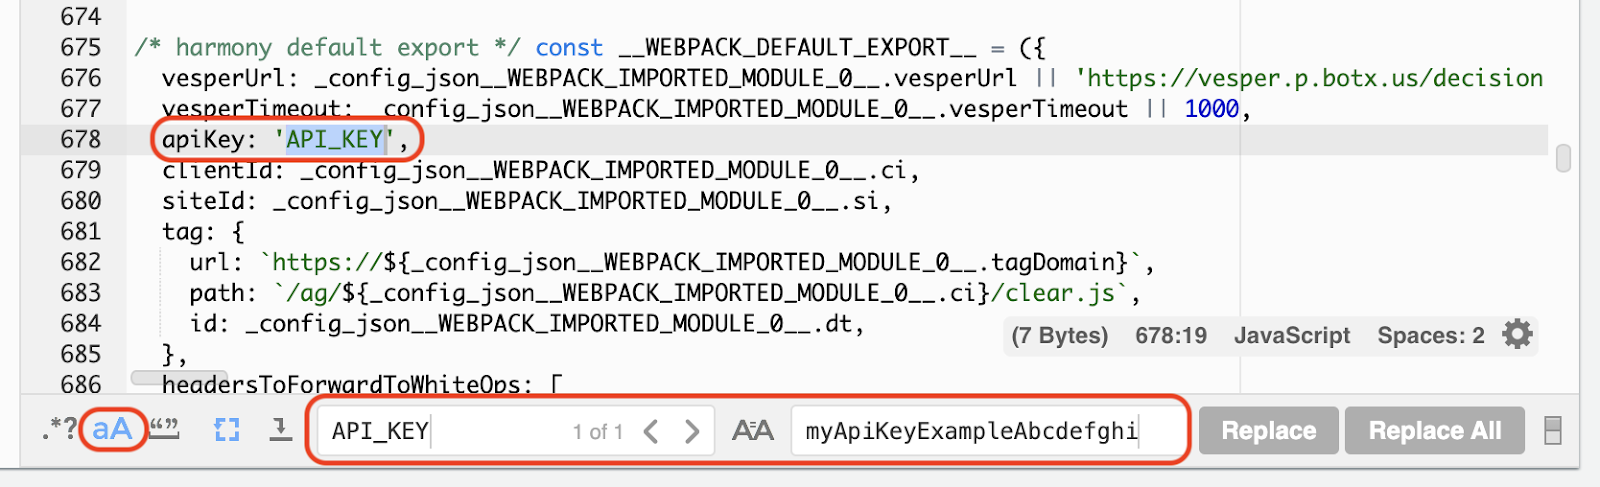
If you are implementing Mode 2 (Active detection), you will need to overwrite the API key placeholder value with the API key provided to you by HUMAN.
To find this value, use the Find command (
Ctrl+ForCmd+F) inside the code editor to search for API_KEY. You may need to turn on case-sensitive search using the icon indicated above. Alternatively, you can navigate to line 678 and find the value in the raw code.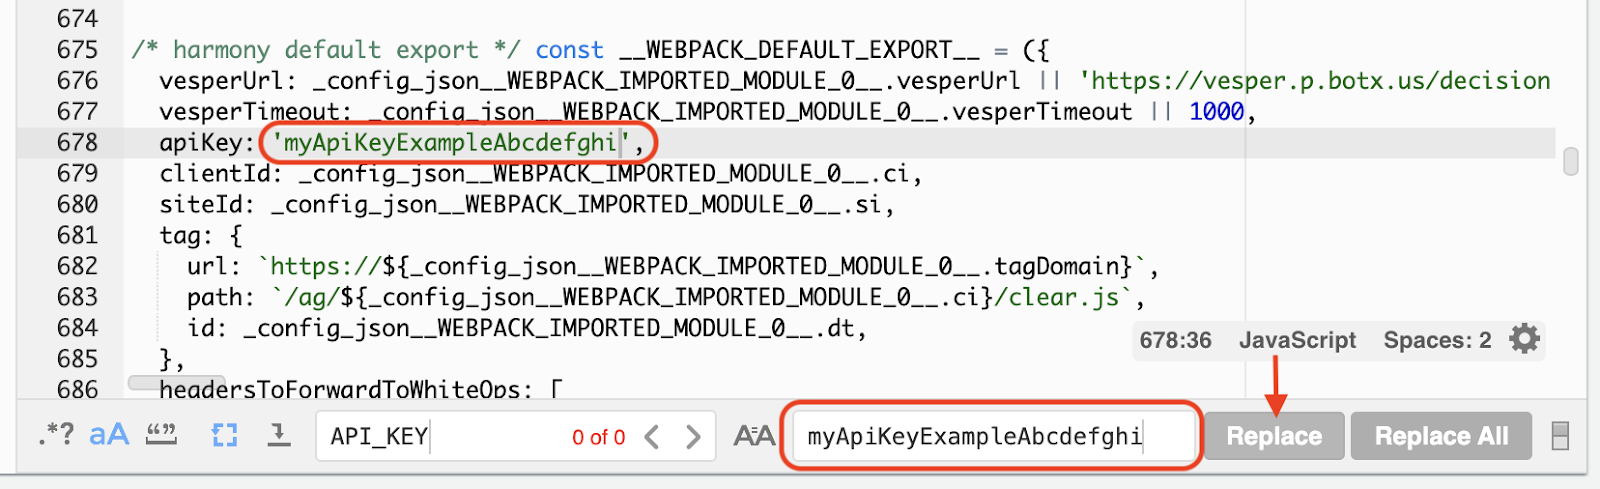
Using the Replace tool, or by pasting the correct value directly into the editor, overwrite the API_KEY placeholder value with your specific API key. After you’ve inserted the new value, use the Save command (
Ctrl+SorCmd+S) to save the edited code.
2: Deploy to Lambda@Edge
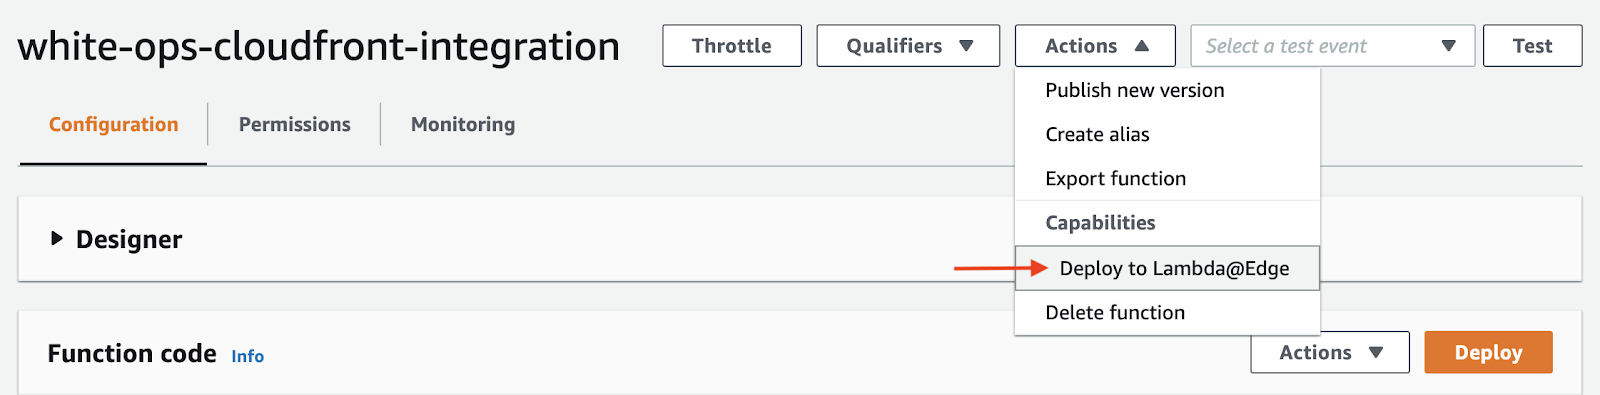
After you’ve created your Lambda function, you can deploy the function to Lambda@Edge. To deploy the function, open the Actions drop-down menu, then select Deploy to Lambda@Edge.
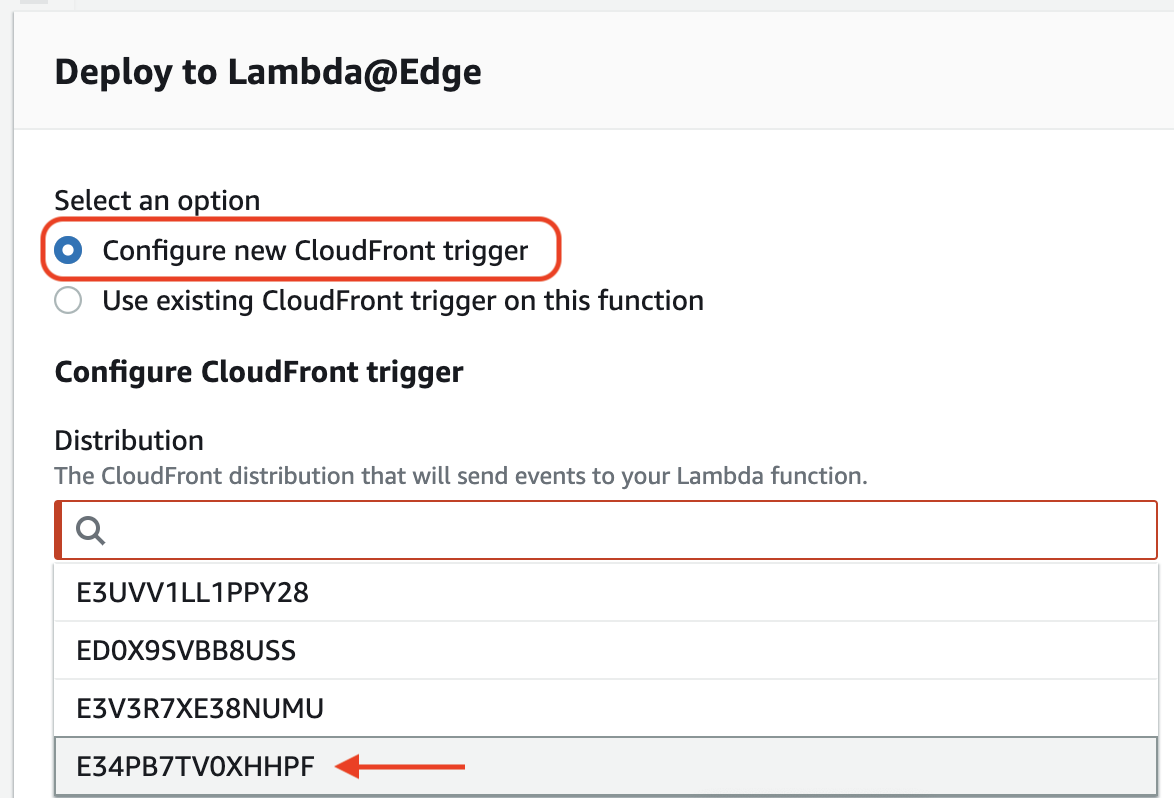
In the modal that appears, verify that Configure new CloudFront trigger is selected. Then open the Distribution drop-down menu and select the CloudFront distribution that you would like to deploy the function to. In this example, we are deploying to the distribution
E34PB7TV0XHHPF.Be sure to verify that the Distribution field contains the correct ARN value.
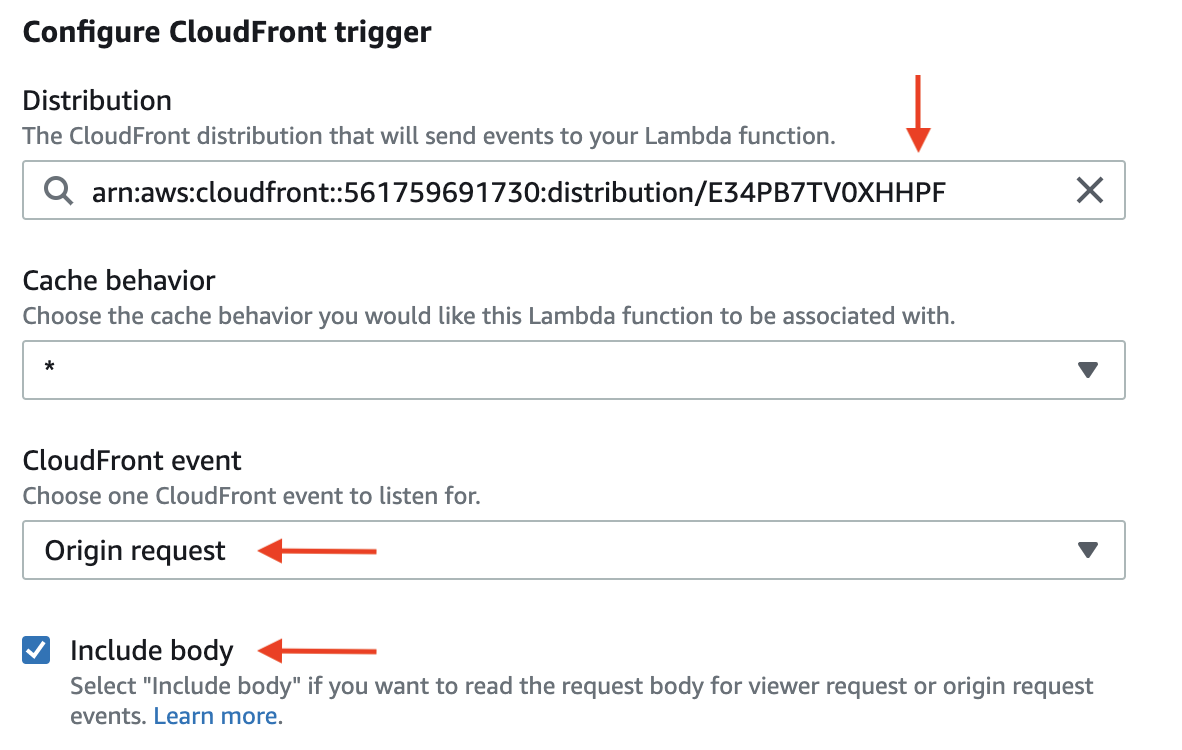
Select Origin request from the CloudFront event drop-down menu, then select the Include body option from the provided checkbox. Depending on your configuration, these values may already be selected by default.
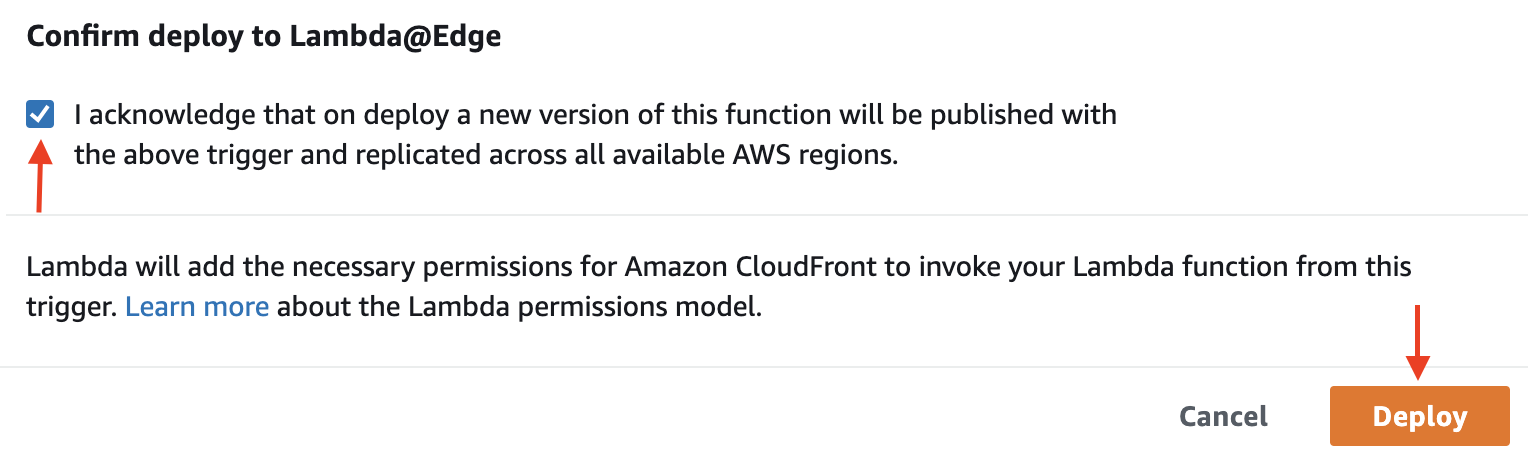
Select the confirmation checkbox, then select Deploy.
Note: It may take several minutes for your CloudFront distribution to redeploy. You can find information about a distribution’s status by navigating to the CloudFront service in AWS and checking the Status column in list view. Your distribution’s status will be
In Progresswhile deploying, orDeployedafter deployment has finished.
Integration Validation
After the Lambda function has been deployed to the CloudFront distribution, it’s important to validate that your code is running properly and that the configured routes for the site are working as expected.
You can manually verify your function by visiting each configured route for the site and checking that all requests and responses are successful. You can also use CloudWatch logs and metrics to confirm that the Lambda@Edge function is being invoked successfully and handling requests as expected.
Logs
After you’ve tested the site, logs from the Lambda function will be written to a CloudWatch log group named /aws/lambda/[aws_region].[function_name] (e.g., /aws/lambda/us-east-1.white-ops-cloudfront-integration). These log groups will include streams containing log events that are recorded each time the function is executed.
Note: These logs will be displayed or stored in the AWS Region closest to the location where the function executed. For example, if your website has users in the United Kingdom and you have a Lambda function associated with your distribution, you must change the Region to view the CloudWatch metrics and log files for the London AWS Region. For more information, please consult this AWS guide.
Metrics
After you've deployed the integration, the Lambda@Edge function will automatically send metrics to CloudWatch. Metrics are available for all Lambda Regions. However, to view metrics in the CloudWatch console or fetch metric data via CloudWatch API, you must use the US East (N. Virginia) Region (us-east-1).
Metric group names are formatted as AWS/CloudFront/[distribution-ID], where [distribution-ID] is the ID of the CloudFront distribution that the Lambda@Edge function is associated with.